Do-it-yourself wiring in an apartment from the panel is done quite quickly and does not cost too much. This is explained by the fact that in this case there is no need to lay the line inside the housing, since this is provided by the construction company. As a rule, the ceiling is used for wiring, but wiring in an apartment can also be carried out from the panel along the floor. The article will describe all the main points of the work.
Stages of cabling between rooms
Do-it-yourself wiring in an apartment from a panel begins with creating a schematic plan. In this case, a detailed diagram of the electrical wiring in the room is required. Prepare it by adhering to certain rules:
- The location is provided and further actions are planned in accordance with it. When the shield is located outside the living space, it is recommended to conduct wiring using copper wire. Its cross-section must be at least 6 mm kV. It is also necessary to find an additional distribution point in the apartment. It should be placed under the ceiling at the entrance to the apartment.
- Next, you should decide how many sockets you will need, based on the calculation of at least one copy for rooms for every 6 m 2. For the bathroom and kitchen you will need two sockets per 6 m2.
- The wiring in the apartment from the do-it-yourself panel to sockets and lighting devices is laid separately. In this case, individual lines are taken into account, designed for sockets with a high rate of electricity consumption - from 2 kW and above. Such devices are used to connect heating boilers, powerful climate control devices, etc.
- After all points of electricity consumption have been calculated, they should be entered into a schematic plan.
Installation of sockets
Do-it-yourself wiring in the apartment from the panel, the photo of which is presented in this article, is carried out at a certain height. As a rule, sockets are installed at a distance of 30-40 cm from the floor level. Lighting switches should be located at a height of 1-1.5 m.
This article will describe the process of conducting electricity using a hidden method. We'll look at how it differs. It should be noted that today open wiring is no longer used. The article provides step-by-step instructions on how to do do-it-yourself wiring in an apartment from a panel. The recommendations will be useful for both beginners and people who are familiar with all the intricacies of electricity.
How to make a diagram
So, how do you do the wiring in an apartment yourself? You can independently connect electricity from the panel in a one-room apartment. For this purpose, it is recommended to use a photocopy of the plan of the new building, on which it will be convenient to mark the locations of sockets, chandelier switches and other components.

The starting point of the diagram is the location for distribution. Usually it is installed in the corridor near the front door. The height of the shield from the floor should be about 1.5 m.
What to consider when drawing up a diagram
When drawing up a plan, you need to take into account the following important points:
- The electrical wiring route in the apartment must be vertical and horizontal along the walls. This ensures a low chance of damage. For example, the location of the outlet will indicate the location of the cable.
- The turning angle of the route must be straight.
- Do-it-yourself wiring in the apartment from the panel to the ceiling is laid below its level by 20 cm. This is the best option. This position will protect the wire from mechanical damage and will not affect the convenience of repair work. You can also do the wiring in the apartment with your own hands from the panel to the floor. In this case, a special plinth is used.
- Switches should be located at the entrance to the room from the side of the door handle. The height of their location is not standardized, but, as a rule, is 80 or 150 cm. The European standard requires installation lower. In addition, it is very convenient for children.

- The sockets are fastened at the bottom at a height of 30 cm from the floor level. But if necessary, they can be placed at any height, for example, above the tabletop. In the kitchen, the number of sockets should be equal to the number of electrical household appliances. Usually 6 pieces are installed.
- A distribution box must be installed in each room.
- Before drawing up the electrical wiring project in the apartment, the location of furniture and equipment is taken into account.
- At least two sockets are installed in the bathroom (for connecting a washing machine and hair dryer).
- The circuit must take into account a 30 mA RCD, which will serve as protection against electric shock. A separate RCD is set to 10 mA. It is designed for a bathroom.
How to choose accessories
Before going to an electrical goods store, you should decide what type of sockets and other elements you are going to install.
- Switches and sockets of a hidden configuration. They are easy to install into the wall and are not too flashy. Moreover, their prices are reasonable.
- The cable diameter should be 2.5 mm 2 for sockets and 1.5 mm 2 for switches. You should first calculate the power and length of the wire. The most suitable cable model for an apartment is VVG, as it has an optimal ratio of cost and functionality. In addition, copper wire is able to withstand high current loads and is durable.
- Terminal blocks that serve as a connection for wires are inexpensive and highly functional.
- Automated switch for 25 A sockets with a 32 A RCD. For lighting, as a rule, a power of 10 A or 16 A is chosen.
- Wire distribution box made of non-flammable material.

And finally, I would like to note that it is not recommended to purchase cheap products from China. Electrical wiring takes a long time to complete, so it is better to spend money once than to completely replace communications in a few years.
Electrical wiring methods
Do-it-yourself wiring in an apartment from the panel is of two types: open and closed. In the vast majority of cases, the cables are located under the plaster. This is explained by the fact that outdoor installation makes the appearance of the home unattractive. Although this method is applicable in country wooden houses and offices.
Main stages of work
Many people are interested in how the wiring in the apartment is laid from the panel. How to do it yourself is described step by step. To lay internal wiring, you should make a 2 cm recess in the wall. Before this, you need to make markings. Only after this are the recesses designed for switches and sockets knocked out.
How to mark walls
Installing wiring from a panel in an apartment with your own hands involves marking the walls for gating. In some apartments, construction companies prepare ready-made grooves for electrical cables. The article discusses an installation option in the absence of these recesses.
A method that is highly effective and simple is the use of a cord for marking. All that is required from the performer is to fix the rope at the starting point of the route. It carefully stretches to the next point. The result is a clear trace along which the wiring is laid. Once again, it should be noted that the route should only be directed horizontally and vertically. To create a vertical line, use a plumb line, and for a horizontal line, use a building level. The conductor is directed strictly perpendicularly. The cords are secured using clamps and dowels. Then the wall should be plastered.

It is recommended to lay the wiring in a special sleeve that serves as protection. However, the cost of work in this case will be higher. The sleeve ensures the laying of wires without disturbing the plaster. This will be very convenient in case of repeated renovation work in the apartment.
Power lines are drawn from a panel installed separately from the sockets. Then, through communications, they are laid throughout the room. All this can be done with your own hands, but such manipulations require time.
After marking the walls, they proceed to their own gating. It should be noted that wiring electrical cords without gating in an open manner is more simple, but less reliable. It is recommended to do closed wiring in the apartment. The external method is only suitable for the balcony.
How to shingle walls
To tap walls, you should prepare the following tools:
- chisel;
- hammer;
- grinder with a disc designed for working with concrete.
The width and depth of the groove should be 2 cm. Then you can proceed to the installation of electrical wiring.
How to lay a route
As noted earlier, wires must be purchased with a reserve. Extra footage will be needed for the connection. On each side, the core should be exposed by 5-10 cm. For connecting sockets, switches and lamps, a length reserve of 5 to 15 cm is taken.

First you need to decide how the wiring will be fixed to the wall. Modern methods involve the use of clamps, but the ancient method of fastening using alabaster is considered more reliable. For this purpose, you should mark a line in grooves and use alabaster every 30 cm.
Important information
Alabaster hardens very quickly, so you need to work quickly. After the line is completely fixed, it is recommended to photograph all the walls. During the next repair, you will be able to accurately determine the passage of the wiring.
How to connect accessories
This stage is not difficult at all. Sockets and switches should be connected. For this purpose, socket boxes and boxes are installed in the grooves. It is also recommended to fasten these elements with alabaster, as it is reliable.
How to connect machines and RCDs
The last stage in the apartment is the assembly of the shield. Based on the diagram drawn up, you should connect circuit breakers and RCDs. There is no difficulty at all: the input wire should be routed from above, and the outgoing wire should be connected to the distribution box. After connecting electrical products, you need to check the electrical wiring using a multimeter. This way you can see how correctly the work was done. If no interference is detected, then you can connect the machine.
Compliance with safety regulations
Do-it-yourself wiring in an apartment from the panel must be carried out in compliance with certain safety rules.

They are guided by a number of rules:
- You should first turn off the electricity in the apartment;
- Under no circumstances should a cable be connected if there is current passing through it;
- Before installing drawers and panels, you should make sure how firmly the structure is fixed;
- soldering of wires must be carried out in mittens made of tarpaulin, as well as special safety glasses;
- Before tightening the wires into the pipe, all burrs should be removed from it.
An obligatory part of renovation work in an apartment is the replacement or installation of electrical cables, junction boxes, and electrical panels. A well-chosen electrical wiring diagram will protect your home from accidents and unforeseen situations.
We will tell you what you need to consider when replacing or installing electrical wiring yourself. Here you will learn how to draw up a diagram and distribute electrical points in one-room, two- and three-room apartments. Taking into account our recommendations, you can provide yourself with a trouble-free energy network.
Modern household technologies made a significant breakthrough at the end of the 20th century. In addition to televisions, homes now have computers, security and video surveillance systems, powerful household appliances, and wireless communications. In this regard, wiring electrical cables has become much more complicated, although the principles of the device have not changed.
Difficulties begin from the very first stage - design. In order to correctly draw up a wiring diagram in an apartment, you need to know in advance the approximate power of household electrical appliances and their locations. At the same time, you need to think about the lighting system in all rooms.
If you do not take into account the laying of a computer cable and the installation of a router for your home network, you will end up with wires hanging on the wall or stretched along the floor. At best, they can be hidden in a plinth or sewn into a box
In addition to a large number of new devices, one more difference has appeared: along with the power network, there is always a low-current system, which traditionally includes telephone and television wires, as well as computer, security, acoustic equipment and an intercom.
These two systems (power and low-current) cannot be separated, since all devices are powered from 220 V power sources.

Wiring diagram of a low-current system in an apartment. Includes three networks: computer, telephone and television. Each network has its own types of cable and equipment
The number of devices and cables used simultaneously has changed. If previously it was enough to install one chandelier in the hall, now many people use a lighting system that includes, in addition to the chandelier, spotlights and lighting.
In addition to the increase in the number of equipment, it is necessary to add an increase in power - for this reason, the old cables are no longer suitable, and the size of the electrical distribution board has increased noticeably.
Why do you need a wiring diagram?
It turns out that installing modern electrical wiring in an apartment is a real art, which only a professional electrician can handle.
If you do not want to constantly change the decoration of the walls in order to mask cables that appear here and there, we recommend that before renovating an apartment or building a house, draw up a drawing indicating all significant objects related to electricity: sockets, switches, electrical panels, lighting fixtures.
Let's consider the electrical network from the point of view of its component parts:
- Automatic protection devices installed in the electrical panel. The functioning of all home equipment and the safety of users depend on their quality and proper installation.
- Cables, wires with the correct cross-section and good insulation.
- Sockets and switches with high-quality contacts, safe housings.
In private houses, a mandatory element is an input circuit breaker and a power cable from it to the switchboard. They help regulate power consumption and, if necessary, turn off all electricity at home.
Do you want to change the wiring in your apartment yourself? - It's possible! To do this, it is not necessary to have a valid electrician's permit or an electrician's diploma. It is enough to be an electrician at heart, and have a little technical education and understanding of what you are dealing with. If you don’t have enough practical experience, but you really want to change the wiring yourself, this article is for you.

Calculations and diagram

Single-line diagram according to GOST
First you need to draw wiring diagram for your apartment. To do this, you don’t need to be an engineer, because you don’t need a complicated linear diagram according to GOST. It is enough to draw a schematic drawing by hand. An electrical wiring diagram is needed in order to correctly distribute the cable throughout the apartment, and calculate its approximate amount, as well as determine the load on each future line.

Wiring diagram
Draw where you will have sockets and switches. At the same time, take into account what household electrical appliances you will include in them, how many and what kind of lamps you will use.
It is not recommended to hang more than 8-10 sockets on one line. Since all sockets in the line are pass-through, then with each subsequent socket there is a possibility of weakening the contact. Especially do not make many sockets on one busy line, for example in the kitchen; it is better not to save money and extend two lines to the kitchen.
Determine the required number of lines and the expected load on them. It is better to divide the lines into zones, for example: kitchen sockets, corridor sockets, bathroom sockets, room 1 sockets, lighting, etc.
Cable selection
In order for electrical appliances to operate without overloading the network, the cable of each line must be of the appropriate cross-section. And if there are several consumers on the same line (for example to the kitchen) (and there will be), then it is necessary to calculate their total power and leave cable safety margin, that is, select the desired cross-section (wire thickness). The power of all household appliances is always indicated by the manufacturer. For example: an incandescent lamp is 40W, and a hob is 6000W, etc.
In order not to bother with calculations, follow one simple rule. — For outlet lines, use a copper cable with a cross-section of 2.5 sq. mm, for all lighting 1.5 sq. mm, and for a hob or instantaneous water heater 4 sq. mm - and everything will be fine!
Each device (consumer) has its own declared maximum power, measured in Watts.

Simplified power formula

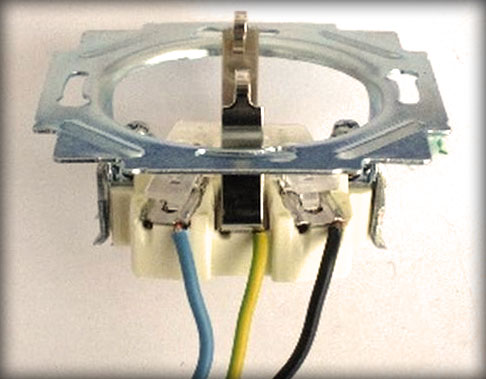
The cable must be three-core (phase, neutral, ground). Zero is always blue, ground is yellow or yellow-green, phase is any other color. If you change the wiring, do not skimp on the material - always take a cable with a third core (with grounding), because all modern devices have an additional protective terminal, and automatic protective equipment only works using grounding .

To replace electrical wiring, it is best to use a VVG-ng cable. You can, of course, use NYM or PVS, but the advantages of the VVG cable over others are obvious. Firstly, VVG does not need to be crimped with sleeves (soft ones need to be crimped). And secondly, it is smaller and flat, which allows you to make smaller grooves, and it is possible to insert the cable into a thin slot (3mm for a three-core cable with a cross-section of 1.5mm)

Uncrimped wire with sleeve
Always take only cable in accordance with GOST! For example, an excellent cable is the Gostov VVG ng. This is a very important point in preparing to replace the wiring! You can save on automation or sockets (they can always be replaced), but don’t skimp on the cable - get a good one.
Marking
Determine at what height the sockets and switches will be located; the easiest way is to measure the lines of sockets and switches from the ceiling, because the floors in apartments are most often crooked. For example, if the height from floor to ceiling after renovation will be 250 cm, and you want to raise the sockets by 30 cm, measure 220 cm from the ceiling. If there are several sockets and switches in one group, draw a horizontal line along the level and place a mark every 7 cm (socket box size 71mm), the same applies to vertical groups.
For lovers of standards, so that it is “like everyone else” or “how they do it” - remember they don't exist! There are requirements for children's institutions, kindergartens and schools, where sockets and switches are installed at height not lower than 160 cm.. Everything else, especially in your home, you can do as you please. For example, some make sockets in window slopes or even in the floor.

Preparing for gating
Typically, wiring in apartments is carried out either on the floor or on the ceiling. There are other options, such as laying cables under baseboards or ducts.
Lighting lines, in any case, are laid behind a suspended or suspended ceiling; if these are not planned, then the ceiling needs to be chipped. And since, monolith of ceilings ditching is strictly prohibited, you need to apply a layer of plaster to the ceiling, which will allow you to hide the cable without damaging the monolith. We strongly do not recommend ditching the ceiling yourself, since you need to know the technology for correct gating so that the whole house doesn’t collapse someday.
In cases where plastering of the ceiling is not planned, experienced craftsmen find voids in the monolith slab with the old cable, and tighten a new one in its place.
Using a 70mm or 68mm concrete crown (attachment for a hammer drill), holes for the socket boxes are drilled. Using a wall chaser or grinder, grooves are cut out for laying the cable. There should be grooves in the walls strictly vertical, not horizontal or diagonal. The lines from the sockets to the panel are laid in the floor screed or along the ceiling.
If the ceilings are not wooden, then according to the PUE (electrician's bible), cable laying without corrugation is allowed! There is also no need for a corrugated floor screed; the most important thing is a high-quality cable with good insulation in accordance with GOST! Save on corrugation; if you don’t have drywall or wood (or other flammable materials), then you don’t need corrugation!
Noisy work
When you start hammering walls, don’t forget about the law. You can make noise with a hammer drill in apartment buildings only at strictly defined times; each region of the Russian Federation has its own rules. For example, in Dagestan you need to get permission from the elder, in Moscow they simply call the police without talking, and in Taganrog they start beating in response. It's better to start work on weekdays from 9 to 19, with a break for lunch from 13 to 15.
Grilling
Before you start dabbling, it is highly advisable that the walls and ceilings be plastered with a leveling layer of plaster. Firstly, you will not have any further problems with the final installation of sockets, since everything socket boxes will be flush with the wall, and not recessed into it (which happens when they are installed before the walls are plastered). And secondly, gating will occur much faster, since in some places it will not be necessary to saw the monolith.

Check in advance the places where you will be trenching so as not to touch communications, such as old wiring and plumbing pipes. If you can't determine where the old wiring goes, call an electrician, or just turn it off in the shield (if you are going to change it all). For ease of work, make yourself a temporary carrier (extension).
The hole for the socket boxes is drilled to the full depth of the crown. To quickly drill a hole in concrete, mark a circle with a crown, then drill the maximum possible number of holes around the circumference with any drill, no less than the depth of the crown. After which, the cutting with a crown will go noticeably faster, one might say – it will go like clockwork. If it gets on the reinforcement, it is best to use another crown; in extreme cases, you can knock it off with a spatula. It’s better to use a hammer drill for help (don’t forget about neighbors and the police).
Working with a wall chaser or grinder
Grooves for laying cables go from the socket box to the floor or ceiling. You need to lower the groove down so that the cable lies quietly in the screed and does not stick out in the corner, so you need to know the thickness of the future screed, the same with ceilings. It is best to have a wall chaser with a vacuum cleaner for these tasks, but in extreme cases you can get by with a grinder and a diamond disc for stone. In the case of an angle grinder, take care of your health, wear a respirator and goggles. Close all windows and doors to prevent dust from entering adjacent rooms.

Cabling
Laying the cable on the floor is not difficult; it is enough to hold it to the floor in any way so that it does not float up when they make the screed. Usually they lay the cable along the walls (at a distance of 10-15 cm from the wall) so that later they know exactly where the cable goes.
It is worth noting that it is better not to lay cables under doorways! To lay the cable along the floor, it is better to make through holes between the rooms. Otherwise, there is a possibility of damaging the cable when installing the interior thresholds.
Laying the cable in the groove is also not particularly difficult. You can secure the cable in the groove using dowel clamps or ordinary alabaster (construction plaster). Alabaster hardens quickly, so it is also convenient to use for installing socket boxes. But before you smear the grooves with it, you need to remove dust from them and moisten them with water.
If the cable is securely fastened in the groove and does not stick out anywhere, the grooves can be covered with ordinary plaster mixture; this will save a lot of time.


About junction boxes
Junction boxes (or distribution boxes) are necessary for switching (connecting) wires in them and branching lines, for example, for a switch.
Today, professional electricians will tell you that There is no need to install junction boxes in existing apartments! They can play a cruel joke on your wiring. In the event of a short circuit, tearing, flooded neighbors, etc., you will need access to this very junction box. It’s easy to give up junction boxes - do all the switching in the socket boxes! For this we need DEEP socket boxes, in which all switching for lighting will take place. Typically, deep socket boxes are made for light switches, but if switching is needed to branch out socket lines, then deep socket boxes are also installed under the sockets.

Electrical panel installation
The most budget option is to install all the circuit breakers on the staircase in a common panel, where your old circuit breakers and counter are already located. To do this, it is necessary to route all the cables into the access panel. If you want a shield in your apartment, then you need to choose a suitable place for it.
Built-in or overhead shield is up to you. The built-in one looks more aesthetically pleasing, but the overhead one is easier to install. All lines from the apartment go to the panel, and from it one thick cable goes to the entrance panel, the cross-section of such a cable must be at least 6 mm, that is, a three-core cable, for example VVG 3 * 6.
Installation of circuit breakers
Each individual line is equipped with its own circuit breaker, with a rating depending on the cable cross-section. According to the rules, you cannot insert more than two lines into one machine; if you are trying to power more than three lines from one machine, you must install a special branching bus.
Today there are many ways to protect electrical wiring, even at the household level. The most necessary condition is the installation of circuit breakers for protection against overloads and short-circuit currents (conventional single-pole circuit breakers). It is also recommended to install an additional residual current device - RCD (current leakage protection).
It is best to install RCDs on the lines of high-risk areas: wet rooms, children's rooms. There is no need to install one common RCD for the entire apartment! They install one common RCD only for the purpose of saving. The consequences of such savings are a complex diagnosis of a fault in the event of a leak, + the entire apartment is left without light when it is triggered. On some lines, for example, lighting or street lines, an RCD is not installed.
Installing additional types of protection is already a luxury: thermal relay (protection from cable heating), lightning protection, stabilizer or protection against voltage surges (saves from 380V), fire alarm, etc.
Shield assembly
One of the most crucial moments is assembling the shield. If you are using a soft cable, then before inserting the wire into the machine, it must be crimped (to increase the contact area). Only phase wires are inserted into single-module machines (phase marking L - can be any color except blue and yellow), all others (zero N blue, ground PEN yellow-green) are inserted into their busbars. When using RCDs or difavtomats (automatic and RCD “in one bottle”), the neutral wire is inserted into its groove (marked N - neutral, blue. The common phase connects all the machines to each other, for this, instead of jumpers made of wires, it is better and more reliable to use special combs.
For all connections in the switchboard, it is very important to use wires of the appropriate cross-section, that is, it is best to separate the phases and neutrals across the circuit breakers using a cable with a cross-section of 4 sq. mm or 6 sq. mm. Also, after tightening all the cables and combs in the machines, it is necessary to check the reliability of their clamping. Since it often happens that the wire simply does not fit into the clamp, or does not hold well in it.

Final installation. Sockets and switches
Sockets and switches are installed last, after clean finishing (painting or wallpapering). The most important rule of good installation is good contact!
Most of the outlets in your apartment are pass-through, that is, through them the cable goes in a loop to each subsequent outlet. To avoid problems with wiring in the future, firstly, do not buy cheap sockets (for example IEK), they have a very poor (to put it mildly) clamp and subsequently such sockets and switches can simply burn out. And secondly, pull all connections a second time! Check each pinched or twisted wire by tugging on it. If the wire jumps out of the clamp, it means you did not clamp it properly or the clamp was defective.
Among professionals, it is believed that the best clamps in sockets are produced by LeGrande and Schneider.
To ensure that the frames lie flat and tight, install a group of sockets or switches level, joint to joint, and screw them to the socket boxes with small self-tapping screws on two opposite sides, close to the wall. Then tighten the spacers inside the socket (if any). It is important not to touch the wires inside the socket with spacers or screws!
Monitor the position of the cable in the socket so that it does not fall on the spacers. Also, do not use screws that are too long, as they may touch the wires.
At each stage of repair, it is necessary to check the lines for operability, since after the final finishing it will be impossible to fix anything without damaging the finishing.
When planning to replace electrical wiring with your own hands in a one-room apartment, or with the help of a professional electrician, you need to draw up a connection diagram for all wiring lines, sockets, switches, junction boxes, various permanently installed electrical appliances (fan, air conditioner, electric stove), circuit breakers and residual current devices ( RCD).
In terms of electrical wiring, in addition to listing the electrical connections, it is also advisable to indicate the exact location of the connection point for each electrical receiver in the apartment.
 Example of a room wiring diagram
 In relation to one-room apartments, due to the apparent simplicity of cable routing, many novice craftsmen ignore the electrical wiring layout, immediately starting work with a vague idea of the diagram and the final result.
As a result, with this approach, you may encounter unforeseen difficulties and problems. In addition, electrical wiring installed incorrectly by yourself, without knowledge of the rules and requirements, can cause an accident.
 accident, burnt socket and electrical wiring
 Step-by-step formation of a general wiring diagram
When drawing up a cabling plan, it is necessary to divide the drawing of the wiring diagram into four stages, one for each room of a typical one-room apartment (living room, hallway, kitchen, bathroom).
 An example of a wiring diagram for a one-room apartment
 Regardless of the layout of the home, it is necessary to think through the electrical wiring for each room separately, based on the specific purpose of each room.
Specifics should be understood as the use of electrical appliances and equipment, as well as the location of sockets, switches, and controls. It is necessary to familiarize yourself (information is available on this resource) with the specifics of electrical wiring in each room of the apartment, drawing up a general diagram with your own hands.
Cable calculation based on load
When drawing up a wiring diagram for each room, it is necessary to adhere to the fundamental sequence of actions, which are based on a logical chain of concepts, the explanation of which is beyond the scope of this article:

Therefore, it is necessary to correctly calculate the cross-section of the wires to be installed and indicate them on the plan diagram. A method for independently calculating cross sections for current or power consumption can be found on this resource, or taken from other trustworthy sources.
 An example of a diagram of switching devices divided into groups and cable sections for a one-room apartment
 There you can also find a description of the types of electrical wiring, methods of laying them and the types of cables used.
Dividing electrical wiring into separate lines
Another principle that should be adhered to, regardless of the purpose of the premises of a one-room apartment, when drawing up its electrical wiring diagram with your own hands is the division of consumers into groups.
 An example of an apartment wiring diagram
 The minimum option is a group of sockets and lighting. This means that from the apartment panel there must be separate cables protected by automatic devices for sockets and electric lighting devices.

In addition to electrical safety, this approach compares favorably in terms of the convenience of replacing a switch or socket with your own hands - you will be able to use electric lighting devices without turning off the entire electricity in the apartment.
 Bathroom diagram
 For powerful consumers of electricity, such as a boiler, electric stove, air conditioner, refrigerator, it is necessary to lay a separate line.
 Kitchen wiring diagram
 This requirement is justified by the fact that the cross-section of the wires supplying power to these electrical appliances must be larger than for cables supplying less powerful equipment.
Accordingly, a circuit breaker designed for this cross-section may not work if an overcurrent appears in a cable connected in series with thinner cores, leading to overheating, melting and fire of the insulation.
Protection from defeat
All groups of sockets must be equipped with RCDs that respond to current leaks through the human body or insulation. In this way, protection against damage occurs when dangerous voltage appears on the housing of electrical appliances, and fire safety is ensured. In relation to the bathroom, the presence of an RCD is a prerequisite when installing sockets.

It is advisable to install an RCD on the lighting line too, especially for the bathroom. For example, metal parts of wall lights may become energized and cause injury if touched.
In addition, there may be water in the distribution box, switch or terminal block of the chandelier due to the fault of the neighbors above. Getting water on conductive surfaces will not cause a short circuit and will not cause the circuit breaker to trip, but may cause a leak that can damage the insulation and lighting equipment.
The RCD must be connected in series with the circuit breaker, and the rated current of the RCD must be one value higher.
 RCD connection
 The RCD + automatic circuit breaker can be replaced with a difavtomat, combining both of these devices, which are installed in the apartment distribution panel.
 The shield itself should be in an accessible place at a height inaccessible to small children.
 Installation height of the switchboard in the corridor
 The need to comply with rules and regulations
When drawing up an electrical wiring diagram, in order to avoid accidentally damaging other communications when installing wires, you must have at hand a plan for their wiring in the apartment.
After checking the location of pipelines and various cable lines, you need to carry out electrical wiring, if possible avoiding its intersection with these communications, adhering to the rules for laying electrical wiring, which are described in detail on this resource.
 example of wiring arrangement in a room
 For convenience, this article contains quotes from the rules for electrical installations (PUE) and building codes and regulations (SNiP).

These standards also include the location of electrical wiring, sockets and switches in relation to doors, walls, floors and ceilings. Determine the exact location of wiring and electrical points in the apartment, indicating distances in meters or millimeters on the plan.

Since access to distribution boxes must be ensured, their number can be reduced - when planning the wiring for sockets and switches, it is worth planning in such a way as to make the necessary connections in the socket boxes of switches and sockets.
Symbols on the plan
If documentation for an apartment requires a professional drawing of the electrical wiring diagram, then it is better to contact the relevant organizations that have qualified specialists, and having the right to draw up such documents.
But when drawing up a wiring diagram for a master, or planning to do all the electrical work yourself, you need to learn a minimum set of symbols for various electrical points and electrical receivers commonly found in the apartment.
 symbol of switches and sockets on the diagram
On the wiring plan, all three wires necessary to connect the sockets (phase, neutral, ground) can be indicated by one line to make the diagram easier to read, and the wiring lines for individual groups of consumers should be indicated in different colors.
 hand drawing of the apartment plan
 The drawing can be drawn by hand, the main thing is to be careful and precise in the notation.

There are many apartment wiring diagrams on the Internet; they can be used as a template, adding and changing as necessary.
Electricity has been and remains a valuable benefit for a person’s daily life needs and his comfortable living. Electrical wiring in an apartment is a source of lighting, heating, and energy supplier for the operation of all household appliances. Today, the cable line system, like any communication, has high requirements, which necessitates the need to study installation rules and gain knowledge about the basic elements of electrical engineering.
Modern wiring
Before laying the wiring, you should pay attention to the type of distribution board, which must match the load of electrical appliances. Apartment electricity meters must be protected from mechanical damage and easily accessible. To do this, they must be placed in wall niches and in locked cabinets.
Most often they occur as a result of damage at the junction of wires. It is also necessary to pay attention to the placement and number of sockets. To avoid short circuits, do not install them behind electrical equipment and try to keep them away from water ingress as much as possible.
A small apartment where in one room there are more than two sockets intended for the use of powerful electrical appliances is considered a violation of safety regulations and risks a wiring fire. This can be avoided if you know exactly what cross-section of cables is best suited for the electrical appliance and what size of wires is needed.
In order for the electrical system of the apartment to work for a long time and not need repairs, it is necessary to make a correct calculation of the power of the entire wiring system in order to prevent overload and emergency shutdown.
Therefore, when assembling an electrical wiring diagram, switches and sockets are connected to the phase wire break, and lamps and chandeliers are connected to the neutral wire. It is prohibited to use devices that do not have a technical passport.
Control methods
When drawing up an electrification project, it is necessary to take into account the architecture of the room and its area. So, for example, to create a cozy atmosphere in a one-room apartment, the amount of electricity consumed depends on the power of ceiling and additional lamps, and the number of sockets for connecting household appliances. It is important to maintain a functional and uniform distribution of energy sources.
 When renovating a home at an early stage, it is important for owners to agree with professionals on the number of proposed sockets, switches, and ceiling lights. Before purchasing equipment for electrical wiring, it is necessary to accurately measure the area of the room, calculate the required lighting in watts per m², and determine what cross-section of cables can provide current.
You can get the total amount of electricity consumed by all electrical appliances in the apartment using a table. The calculation indicator will allow you to determine what maximum power can be used in your home, and based on this, choose the type of wiring. If in the future you plan to use electrical household appliances such as an air conditioner, electric stove, home theater, this will help avoid problems with wiring in the future.
Important points
When drawing up an electrical wiring plan, you need to take care of the financial costs of electricity consumption. To do this, it is important to purchase lighting sources with maximum light output and a long service life. When choosing fuses and current meters, count on the fact that all electrical appliances will work simultaneously.
When using extension cords and tees, in order to avoid short circuits or fires, it is recommended to use modern electrical devices with zero contacts and overload protection. When carrying out residential wiring, care and strict adherence to installation rules are required.
It is strictly forbidden to lay wires and cables in the same pipe. They are not allowed to touch sharp objects, hang them on nails, paint them, or whitewash them. Electrical wiring in the room is carried out only using junction boxes and socket boxes.
Using the services of professionals, adhering to the drawn up project, observing all fire safety standards, the electrification of any home will be considered viable, durable, and economical.