The bed, as a rule, is ready in the fall; usually after cabbage or zucchini, pumpkin, strawberries, green manure. After harvesting, I cover it with lime and cover it with black spunbond until spring.
It happens that I prepare a garden bed immediately after winter. I always choose a sunny and dry place and, as soon as the earth warms up, I dig a trench, lay in overripe compost, sand, garden soil, spill it with Baikal-EM and cover it with film and black spunbond. In such a bed, weeds do not grow due to lack of light, and the soil warms up faster, and beneficial microorganisms begin to work early.
In the spring, on the day of planting, I open the bed, add ash (1-2 cups per 1 m²), complete mineral fertilizer for onions, loosen it, and spill it with Fitosporin solution.
Selection of seed material.
Choose a variety that is adapted to your climate zone and resistant to various diseases.
From the large assortment in the garden store, I prefer sets of an oblong, elongated shape: for some reason, this is exactly the kind that guarantees a healthy and plentiful harvest on my plot. I buy seedlings in February, and in early spring I sort through the planting material, remove disease-affected, dried out bulbs, sorting them by size.
To get a good turnip, the ideal dimensions would be 2 cm wide and 3 cm high. I find such an “ideal” and select seed material based on it, plus or minus 0.5 cm. I “reject” everything that is smaller and plant it in a greenhouse along the edge of the bed on green feathers. This is not some kind of whim, but a completely reasonable decision: too small a set does not have a good supply of nutrients, so the turnip grows small, and the plants can be weak, with delayed shoots and the head ripening a week later.
After this work, I pour the remaining onions into a box, sprinkle them with ash and put them in a dry place before planting them in the garden.
For 1 m² of bed you will need approximately 0.5-0.8 kg of seedlings.
Landing dates.
Every time it is very difficult to choose the right time for planting: plant early, there is a risk of getting a large number of arrows if the planting freezes, and late - a good and large head may not have time to ripen. Difficulties, of course, arise due to weather disasters: during the day it can be very hot, up to +15°C, and at night the temperature drops to -10°C.
Therefore, I stock up on non-woven material and... wait for the weather (ツ)
It is necessary that the soil warms up to at least +12°C, from about May 15th. Onion sets can withstand slight frosts, down to -3°C, but it is better that this does not happen, otherwise expect bolting. And, as a rule, the onions tolerate low temperatures while still in the ground. With the emergence of seedlings, susceptibility to low temperatures only increases.
Preparing seeds for planting.
The next common question is whether or not to trim the tops of the sets.
Through trial and error, I came to the conclusion that if you want to get more greenery, then you should trim the top by approximately 0.3 mm; and if you need a harvest of good onions, then it is better not to trim them, but to pinch off the dry apical tails.
Soaked and trimmed seedlings grow back better, since the bottom of the bulb gets wet, which facilitates root formation and accelerates growth for the greenery. Only the sections must be treated against the penetration of all kinds of pests and pathogens. I do it this way: I soak the seed material in a warm solution of Fitosporin for 3 hours, then filter and mix with ash. And so I plant such a “dirty” set. At the same time, plants develop better.
Pruning should be done immediately on the day of planting.
Remember that if you plant, you cannot prune it.
To get greens on the table faster, I separately plant onion sets on a feather. I do this back in March-April in the greenhouse.
Landing.
For even plantings, you can use egg cages, but each hole will have to be further deepened a little.
If the soil is loose, then the onion can be stuck into the ground, holding it by the side. You need to hold it so that when lowering it into the ground, it is not the root that breaks through the soil, but your fingertips.
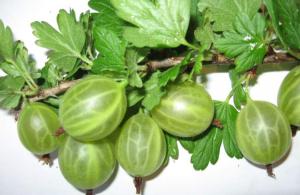
(see photo nearby).
The planting depth depends on the size of the set and should not exceed twice its height. The distance between the rows is no more than 10 cm, and the rows themselves are no more than 5-7 cm. If necessary, I thin out using onions for cooking.
If the ground is not soft enough, then firstly, add sand, and secondly, make small grooves, for example with a flat cutter, compact the bottom and lay the seedlings bottom down, loosen.
I immediately cover the beds with spunbond; if there are severe frosts, which is becoming common, then I add a second layer.
I plant seedlings not only in a separate bed, but also with carrots, beets, and tomatoes outside. But mostly the onions go there, which I then pull out with their green feathers for food.
I liked using hydrogel when planting. This is how I was able to get rid of rotting bulbs in the rainy summer: the hydrogel took away excess moisture and released it only when the plants needed it.
Caring for seedlings.
Fighting the onion fly.
I do one preventative watering against the pest: 100 gr. coarse salt into a 5-liter watering can with a pink solution of potassium permanganate. Instead of watering with salt water, you can sprinkle salt when planting the sets.
You can also sprinkle the ground with ash and tobacco dust, ½ cup per 1 m².
If possible, I keep plantings with onions longer under arcs with spunbond; In this way I protect them from the onion fly, whose flight begins with the flowering of cherries and dandelions.
And I already wrote, but I will repeat, “To protect against onion flies, I advise you to throw a couple of carrot seeds every meter when planting in rows. Of course, you won’t reap the harvest, but the smell of carrots repels flies.”
Peronosporosis, prevention and control measures.
dry the soil by stopping watering and increasing loosening work;
add ash - 1 cup per 1 m².,
Spilling Fitosporin solution will also help,
Metaxil, Ordan, Proton - drugs of hazard class 3, contact-systemic action, spraying on young leaves and at the beginning of bulb formation; protect, have a long-term preventive and curative effect.
Downy mildew or downy mildew is a fungal disease, one of the most common onion diseases. You can notice it after three weeks: the leaves are curved, practically do not grow, yellow spots and a purple and then gray coating appear.
The disease occurs in low light, damp and rainy weather, and low temperatures up to +15°C. The fungus overwinters on plant debris or seed material. Infection is transmitted by fungal spores with the wind and over long distances.
If you prepare the seedlings and bed as described above, then downy mildew will bypass you.
You need to fight the disease as soon as you see its first signs:
After harvesting, the leaves must be burned.
As you can see from the article, growing turnip sets is quite a troublesome task, but the most difficult work takes place in the spring. If you do it carefully and correctly, then in the future you will free yourself from additional watering, fertilizing, and pest control. Planting seedlings will only need to be weeded and loosened.
Author of the article: Love
When copying text, please indicate the address of our website.
Onion cultivation must be carried out according to certain agrotechnical rules. This will allow you to harvest a rich and high-quality harvest.
Onions belong to the lily (onion) family and the monocot class. Central Asia is considered its homeland. This vegetable crop is grown in almost all garden plots. Spicy heads are used as a seasoning and added to many dishes.
Onions are rich in beneficial substances. The taste and smell are due to the high content of essential oils. Their content may vary, it all depends on the growing conditions, the degree of maturity and storage of the harvested crop. Knowing the secrets of onion care and cultivation, you can get a healthy, rich and high-quality harvest.

There are more than 400 types of onions, but only 10 of them have been introduced into cultivation. The vegetable belongs to the one, two and three year group of plants. When sowing seeds (nigella), a set is obtained. The seeds are small, weighing only about 1 g, the set reaches 2 cm in diameter. When planting the set, large onion heads are obtained. When they are planted in the third year, they again receive arrows with boxes in which the seeds ripen.
Onions are a cold-resistant crop. Seeds germinate at temperatures around +3 degrees. However, growth and development occur best at an air temperature of +11 degrees.

The root system of onions is poorly developed, so it places great demands on the composition of the soil. In addition, during cultivation, onions require special care.
Variety of onions
There are two large groups of onions intended for cultivation in open ground:
- A group of varieties for northern regions, where daylight hours are about 16 hours. Only with such a long day will large bulbs form and seeds develop. Northern varieties with short daylight hours will only have time to form green feathers.
- Southern varieties of onions can form large, dense and juicy onions with short daylight hours (day length is about 12 hours). If you plant such varieties in regions with long daylight hours, the bulb will form and store poorly.

Currently, breeders are developing varieties that do not respond to daylength. When planting them in both northern and southern regions, you can get a good harvest.
Before sowing in open ground, it is recommended to treat planting material of any variety with growth stimulants and disinfectant solutions.

Onions are divided into groups based on taste
There are types of onions that can be divided according to taste. It all depends on the ratio of sugar and essential oils in the onion:
- Spicy.
- Peninsular.
- Sweet (salad).

If the sugar content of this cultivated plant is low, then the level of essential oils is low. Such an onion will not be very sharp and few green feathers will form. In addition, the taste is affected by proper care and taking into account all the rules of agricultural technology. Breeders annually develop new types of onions for cultivation. Among the new varieties, there are those that have a sweet taste without a hint of bitterness.
Sevok is planted very early in the spring (late April or early May) or as seedlings. Nigella seedlings begin to be sown in mid- or early February. In just two months, the seedlings will be ready to be transplanted to a permanent location. In order for the crop to receive all the necessary nutrients, it must be properly cared for.

General approaches to agricultural technology for growing onions
If all agrotechnical practices are followed, you can grow a good harvest of onions in the basement. For this purpose, special wooden shelves with lighting are made. Place polyethylene film on the bottom of the structure and fill it with soil. In the future, the growing technology is no different from caring for open-air beds.

Predecessors and compatibility
The reason why onions do not grow in the garden is sometimes the wrong place for planting.
The best precursors for onions are vegetables such as cabbage, cucumbers, tomatoes, potatoes, zucchini, and legumes.
Next to the onion beds you can plant carrots, cabbage, beets, radishes, herbs (dill, parsley, cilantro).

Soil requirements
In order for onion heads to grow large in the garden, the soil must meet certain requirements:
- The soil in the beds should be moist, especially in the first weeks after planting. But overmoistening should not be allowed, as this leads to a decrease in taste, rotting and a reduction in the shelf life of the crop.
- There should be neutral acidity. If the acidity is high, it is recommended to add wood ash.
- To grow giant onions, the soil must contain plenty of nutrients, especially organic matter. Even in the fall, compost or humus is added to the soil at the rate of 5–6 kg per 1 square meter. m.

Onions grow well in loose, loamy, sandy loam or chernozem soil, which is characterized by high moisture capacity and moisture permeability.
If the soil is heavy and acidic, the harvest will be poor.
Another unfavorable factor why onion bulbs do not grow is bad weather conditions. Onions are a cold-resistant crop, so they can be planted in early May, when the air temperature is around +5 degrees. The soil temperature should not be below +10 degrees.

Cooling affects the speed of development and growth of the plant. The onion heads grow small, the plant has poor immunity, and the harvested crop will not be stored well.
Specifics of growing onion from sets
Large heads are obtained by growing onions using the Chinese method. Seed material is planted on high ground - ridges that are prepared in advance. The bulbs are deepened by 3 cm and sprinkled with a small layer of earth.

Preparing the soil for sowing
The soil for planting seedlings begins to be prepared in the fall. It is recommended to dig the area deeply (to a depth of 25 cm), and at the same time apply potassium-phosphorus fertilizers. When treating the soil in autumn, the ability to absorb moisture increases. If the soil is highly acidic, it is recommended to add wood ash, dolomite flour or ground chalk in the fall.
Do not dig the soil too deeply in the spring, as the loose substrate prevents seed germination. It is better to loosen the area slightly with a rake in the spring and apply nitroammophoska.

How many days onions grow depends on the variety. On average, a vegetable needs 2.5–3 months to grow. They plant it in May and start digging it in August. Even if the onion head has not grown large enough, you should not keep it in the ground after ripening. As soon as the feathers turn yellow, dry and fall to the ground, start digging.
Preparing the sets
If sets of any varieties of onions were purchased in a store, then they need to be dried by spreading them in one layer on cardboard or fabric material away from heating appliances. If the seedlings were grown independently, then before planting they need to be warmed thoroughly to activate growth. It needs to be heated for two weeks at a temperature of +20 degrees, then heated for 8–10 hours at a temperature of +35 degrees.

Before planting, you can simply fill the seedlings with hot water for 15–20 minutes (the water temperature should be about 45 degrees). After this, the seedlings are transferred to cold water.
After the warming procedure, it is useful to place the planting material in solutions that stimulate growth. For this purpose, drugs such as Zircon, Rost, and Humisol are used.
Onion seeds are disinfected before planting in open ground. For this purpose, it is placed in a weak solution of potassium permanganate or in a solution with copper sulfate (5 g of copper sulfate is taken per 10 liters).

Planting sets
It is best to plant seedlings in mid-May, when the weather is consistently warm. The soil should warm up to +12 degrees. The best place for planting is an elevated place where groundwater does not flow. The site should receive sunlight all day without any obstacles.
In the selected area, furrows are made at a distance of 15–18 cm, 3 cm deep. After this, the furrows are watered with warm water and the seedlings are planted at intervals of approximately 8–10 cm. Do not deepen the seedlings too much; cover it with a small layer of earth on top.
After planting, the seedlings need special care. You need to water twice a week, do not allow the spread of weeds, and after two weeks you need to carry out the first fertilizing.

Feeding
Proper care of onions in open ground consists of timely application of fertilizers:
- The first feeding is carried out 15–17 days after planting, when the phase of active growth of greenery begins. If the feather grows weak, thin and pale, then micronutrients can be added earlier. They use a urea-based solution, which is poured under the root, nitroammophoska. A liquid solution of mullein is suitable as the first feeding.
- The next application of fertilizer is carried out in mid-June, three weeks after the first feeding. At this time, the underground part of the plant is actively developing and it is important to add potassium-phosphorus compounds. You can prepare a solution of superphosphate and potassium salt.
- The third fertilizing with potassium-phosphorus fertilizers (without nitrogen) is carried out only if the soil is depleted and the plants themselves look weak and develop poorly.

If organic matter was added in the fall and all plant residues were removed from the site, then this is usually enough to obtain a good harvest.
Watering
Another thing to consider when growing onions is that they like moist soil. In the first month after onions sprout, you need to water them once every two weeks. If the weather is dry and hot, then the number of waterings increases to once a week.
Water for irrigation must be warm and it is better to pour it between rows. It is advisable to carry out the procedure in the evening or early in the morning.

Loosening the soil is carried out after watering. This procedure allows you to destroy pests and their larvae, prevent the formation of crusts and allow oxygen and nutrients to quickly penetrate the roots of the plant.
After watering, the soil should be wet to a depth of 10 cm. During the period of bulb formation, the abundance of watering increases.
Two weeks before the expected harvest, watering is stopped, only dry loosening is carried out. This will allow all the nutrients to accumulate in the head and not form a crust on the surface of the soil.

Loosening, thinning
As the onions grow, thinning is carried out. When planting densely, two thinnings are carried out. The weakest and smallest plants are removed. During the first thinning, a distance of 4 cm is left between the plants. The second thinning is carried out a month later, leaving a distance of 8 cm between the onions.
Loosening is carried out after watering the soil and after rains. This procedure prevents the spread of weeds and allows oxygen to penetrate unimpeded to the roots.

Whether it is necessary to rake the soil away from the bulbs is a decision that each vegetable grower makes independently. But it has been noticed that the procedure makes it possible to advance the ripening period faster, since more light and heat penetrates to the bulb. The soil should be raked a couple of weeks before harvest.
Protection from diseases and pests
Vegetable beds are often attacked by insect pests and various infections. To reduce the risk of these misfortunes, preventive treatments are carried out on onion beds. Both folk formulations and ready-made, store-bought preparations can be used.

For preventive purposes, onions can be treated with a solution based on copper sulfate. Dissolve 5 g of this component in 10 liters of water and add 30 ml of liquid soap.
Wood ash, ground pepper, and tobacco dust help protect against diseases and pests. The mixture of these components is sprinkled between the onion rows. Between the rows, the soil can be watered with a saline solution (200 g of table salt diluted in 10 liters of water).
Loosening helps destroy pest larvae. You need to loosen onions as often as possible, especially after watering or after rain.

Harvest
Harvesting begins after a third of the onion leaves turn yellow, dry out and fall to the ground. At the same time, the neck of the bulb becomes soft, thins and dries.
After digging, the crop can be dried directly in the garden. If the weather is rainy, then the onions are put indoors. It takes about two weeks for the bulbs to dry completely.
To store onion crops, it is better to choose a cool, dry, dark room with good ventilation. The air temperature should be approximately +3 degrees.

If anyone thinks that growing onions is very easy, then they are deeply mistaken. Of course, onions in the garden will ripen in any case, even if you don’t take special care of them. But whether the result will be good large heads is a big question. To ensure that onions really grow in quality, use our tips.
Onions do not tolerate being grown in the same place for several years in a row. Each new season, the vegetable needs to be planted in a new bed. At the same time, the best predecessors for onions are potatoes, tomatoes, cabbage, cucumbers and all legumes.


Often, onions in the garden begin to form an arrow - this is a long, hard green feather, at the top of which an onion inflorescence forms. If you want to collect seeds, then leave 7-8 of these arrows - this will be enough for both you and your neighbors to have enough seeds. Break off the remaining arrows - if this is not done, then all the strength will be spent on ripening the seeds, and the bulbs in the ground will not reach the required size.
If you want to grow onions in winter, then take any suitable container that will stand on the window. Fill it with universal soil mixture (buy at a flower shop). Take medium-sized bulbs and place them very tightly on the ground. Sprinkle the same mixture over the bulbs, leaving half the bulb on top. Place the bowl with onions in the window and water the winter bed as the soil dries out. In two weeks you will be able to eat green onions grown with your own hands.
Do not grow onions on a windowsill by putting the bulbs in jars or glasses of water. The green part of such onions turns out to be too watery, and the roots begin to rot over time, which leads to the formation of an unpleasant odor in the room.
Growing onions to obtain a head (bulb) in the summer cottages of experienced gardeners does not cause difficulties. However, in order to obtain large (200-400 g) bulbs, it is necessary to strictly adhere to cultivation techniques, which have their own characteristics.

General approaches to obtaining healthy, quality onions
- Large onions start from seeds. Onions per bulb (head) can be grown through seeds (nigella), sets (arbage) and seedlings. In a garden wedge of a summer cottage for growing large onion bulbs for food consumption and winter storage, it is more practical to grow the crop from sets.
- proper storage of seed;
- compliance with the requirements of agricultural cultivation technology.
Bulb varieties and sizes
Do you want to get a large onion? Be careful about the varieties you plant. Onions are a long-day plant and react painfully to the ratio of dark and light periods of the day. Onions have a very interesting varietal feature of reaction to the length of daylight hours. The culture tolerates climate change more easily than lack of daylight.
Southern varieties of onions are genetically predisposed to grow and form a storage organ (bulb) as the length of daylight approaches its maximum - 13-15 hours. The approach of the maximum in the south takes a long period, and the zoned variety manages to build up a large vegetative mass, including a large storage organ.
If a southern variety of onions is planted in the northern region, where daylight hours in the summer season very quickly reach a maximum of 15-18 hours, the plants will tend to finish the growing season as quickly as possible and form bulbs. The formation of the storage organ (bulb) means the end of development and retirement. The bulbs do not have time to gain mass and remain small.
Northern varieties of onions planted in the south will constantly form a leaf mass in anticipation of the onset of the longest day at 15-18 hours. And since in the south the maximum length of daylight hours ends at the 15 hour mark, the crop continues to increase its leaf mass, but does not form a bulb at all. The variety does not have enough light time to move to the next phase of development.
Therefore, dear readers, if you want to get a large onion bulb, be sure to take into account the culture’s reaction to photoperiodicity. Grow southern varieties of onions in the south, and northern varieties in the north. Otherwise, the onion heads will be small, unripe, or not formed at all. In this case, a large-headed, but not zoned variety, and compliance with all the requirements of agricultural technology will not ensure the production of a large onion.

Selection and storage of seed material
It is possible to obtain a high yield of large onion bulbs only by sowing with high-quality seed, which can be purchased in a store or grown independently and properly stored until planting in the ground.
When independently preparing seed, it is necessary to divide them into fractions after harvesting and drying the bulbs:
- Oatmeal, 0.5-0.7 cm in diameter;
- Group I, 0.8-1.5 cm in diameter;
- Group II, 1.5-2.2 cm in diameter.
The best for sowing is considered to be the waterweed of groups I and II.
Before planting, the selected seeds are stored in a cool room at a temperature of 0...+2°C and no higher, and in a warm room at +17...+18ºC (away from heating radiators).
If the temperature regime was violated and the onion was stored at home at a temperature of +2...+15°C, there is no point in hoping for a high-quality onion harvest. When planted in open ground in spring, such onion sets will begin to bolt. A thick, hollow peduncle will take away some of the nutrients, and the onion bulb will be small. In addition, the base of the peduncle in the bulb will serve as a source of rotting in the autumn-winter period.
Thus, the mandatory conditions for obtaining a harvest of large onion bulbs are the variety and quality of planting material.
Onion growing technology
Predecessors of onions
Good predecessors for onions in crop rotation are tomatoes, cucumbers, early and medium-sized potatoes, zucchini, legumes, and early cabbage. Onions combine well with carrots, beets, radishes, and greens, which makes it possible to use these crops as compactors in combined beds.

Seed planting period
Planting onion sets can be done in late autumn or early spring. In practice, spring planting of onions is preferable. Climatic disasters in recent years can provoke early seedlings and their death during recurrent frosts, causing partial rotting of seedlings during the winter. The stressed state of plants will cause the formation of small bulbs.
Depending on weather conditions and warming up of the soil, watermelon is sown in warm regions in the last ten days of March - early April, in colder regions (middle zone) - in the last ten days of April - early May. In the northern regions, after the frosts have passed and the soil has warmed up to +6...+10°C.
The optimal soil temperature for sowing seedlings is +10...+12°C, and air temperature +3...+5°C.
Onion shoots will appear on the 5th – 6th day. If you plant a seedling in unheated soil, it will begin to bolt. If you are late with planting, then, once in dry, overheated soil, the onion will slow down its development and will not form a large bulb. That is, to obtain a large onion bulb, it is very important to meet the timing of planting the sets.
Onion seedlings are tolerant of cold weather and easily tolerate short-term frosts down to -3°C. But during autumn planting and the onset of spring return frosts, the grown plants stop growing and developing when the temperature drops -3...-5°C, which subsequently affects the size of the bulb.
Preparing seed for planting:
- Select only absolutely healthy onion sets for planting;
- Carefully trim the dry ends at the top of the set with scissors;
- To protect the seeds from fungal infections, be sure to disinfect them with hot water, a solution of potassium permanganate, and other known methods. The disinfected onions are dried at room temperature until they flow. Before planting, it is stored in damp burlap.
- The next day they are planted in prepared soil.
Soil requirements of onions
Onions do not tolerate acidified soils and fresh organic matter. Therefore, when growing in crop rotation, organic matter and deoxidizers are added 2-3 years before planting onions under previous crops. Onions do not like soil liming, so if deoxidation is necessary, 3-4 cups of ash per square meter are added during the main soil cultivation in the year of planting. m area.
For normal growth and development of plants, the soil under onions must have a neutral pH = 6.4-6.7 units, be moisture-absorbing, permeable, and fertile.
 Onion planting material - sets
 Fertilizer application
Onions carry significant amounts of nutrients from the soil with the harvest, but there is no need to feed them. A uniform supply of nutrients and moisture during the growing season will contribute to the constant increase in the vegetative mass of the bulb. On depleted and dense soils, in the fall, during the main digging of the soil for onions, add ripe crumbly humus, no more than 1/3-1/2 bucket per square meter. m or sow green manure. Rye, oats, mustard, and rapeseed work well to loosen the soil. On dense, floating soils, you can use mustard with legumes, sweet clover, and vetch-oat mixture. Mixed green manure crops will not only fluff up the soil, but also saturate it with available nutrients.
From mineral fertilizers, nitroammophoska 50-60 g/sq.m. is applied to onions. m. or only phosphorus-potassium fertilizers, respectively 25-30 and 15-25 g/sq.m. m, and in the spring, no more than 20-25 g/sq.m. of urea is added for sowing. m.
If the soils are depleted and higher rates of fertilizer are required, then it is better to apply 2/3 of the dose in the fall, and apply the rest in the spring before planting.
Rules for planting arbage
Sowing is carried out in prepared soil in a single-row manner or in 2-3 line tapes. In the tape, leave 8-12 cm between the rows and 20-25 cm between the tapes.
With the first method, the distance between the bulbs in the row may be different:
- When planting “shoulder to shoulder”, the planting density is high, since the distance between the sets in the row is 1.0-1.5 cm. With this planting method, 2 thinnings are carried out:
- during the first thinning, the distance is increased to 4 cm, and the young onion is used for food;
- after 25-30 days, a second thinning is carried out, leaving a distance between young plants of 7-10 cm.
The second landing method is ordinary. The sets are planted at a distance of 8-10 cm in the row, 20 cm between the rows. Thinning is not carried out. Arbazheika is placed vertically upward in the furrows, to a depth of 4 cm, covered with 2.0-2.5 cm of soil on top and lightly compacted with the palm of the hand.

Caring for onions during the growing season
It is very important to keep the soil moist, loose, and free of weeds during the growing season. Weeds shade the bulbous zone at the base of the plants and provoke the accumulation of fungal infections. Mulching after watering of onions is mandatory. The crust that forms after watering causes an uneven supply of moisture to the top layer of soil (sometimes dry, sometimes wet), which reduces the possibility of the formation of a large bulb. Loosening is only superficial, in wide row spacing. When loosening in a row, damage to superficially located roots negatively affects the growth of the bulb. Onions cannot be hilled. On the contrary, during the growth of the bulb, the “fashionista” opens the hangers towards the sun. Timely watering plays a significant role in the formation of a large bulb.
Watering onions
Watering and feeding onions are especially important in the first 2-3 months. Interruptions in the supply of nutrients and violation of the irrigation regime during this period lead to small onions and loss of their taste.
Approximate frequency of watering:
- For the first month, watering is carried out once a week, followed by obligatory loosening and mulching with crushed mulch. Pests settle under large mulch and fungal infections accumulate. Fine mulch protects the soil from drying out the top layer and quickly decomposes when exposed to moisture. During this period, the soil is soaked to a 10 cm layer when watering.
- In June, towards the bulb growth phase, the amount of watering is reduced to a 10-day break, but the soil is soaked to a 20-25 cm layer. To avoid stagnation of water, watering is carried out with fine spraying.
- In July, watering is carried out once every 8-10 days as needed (preventing the soil from drying out in the root layer).
- In the second half of July, the soil is only kept moist and they switch to “dry watering.” The soil is loosened, mulched, and be sure to get rid of weeds.
- 2-3 weeks before harvesting, stop watering and carefully “expose” the shoulders of the bulbs from the ground. The procedure promotes the ripening of the bulb, especially the stem at the base. Immature stems in winter are affected by fungal and bacterial rot.
Mistakes when watering
- Watering with high pressure breaks the feather, causing interruptions in the supply of nutrients to the plant, weakening it. The plant gets sick.
- Do not water onions with cold water. When watering with water below +18°C, the crop becomes infected with powdery mildew.
- It is necessary to keep the plantings absolutely free from weeds, not allowing them to grow above 5-8 cm.
- In a clogged, unweeded and improperly watered area, the root collars of the onion remain juicy, which sharply reduces the keeping quality of the onion.

Fertilizing onions
The formation of large bulbs requires a fairly large amount of nutrients. Their supply to the crop should be uniform, without hungry breaks and overfeeding. It is better to fertilize onions with nutrient solutions. Applying dry fertilizers is not as effective.
First feeding of onions
With sufficient basic soil filling, the first feeding of onions can be postponed until June, and if necessary, it is carried out 2-3 weeks after germination. Thin light feathers are a signal for feeding.
To fertilize, dilute a spoonful of ammonium nitrate or urea in 10 liters of warm water. Apply at the root to 10-12 linear meters. If the soil (for various reasons) was not sufficiently fertilized before planting, then it is better to carry out the first fertilizing with full fertilizer, using nitroammophoska, Kemiru-Lux, crystallin in the form of a solution (25-30 g/10 l of water). After fertilizing, the plants must be washed with watering using a fine-mesh nozzle.
Second feeding of onions
The second feeding is carried out in the second ten days of June with a solution of phosphorus-potassium fertilizers. 20 and 10 g of superphosphate and potassium sulfate are dissolved in 10 liters of warm water and applied to the root of the plants. During this period, instead of a phosphorus-potassium mixture, you can once again feed the plants with nitroammophos, increasing the concentration of the solution to 2 tablespoons per 10 liters of water. Additionally, foliar fertilizing is carried out with microelements or boron with the addition of ash extract (0.5 l per 10 l of water).
Third feeding of onions
The third feeding is carried out if necessary, if the development of the bulb slows down. The third feeding is carried out when the bulb is the size of a walnut, usually with a superphosphate solution. 40 g of superphosphate are diluted in 10 liters of water. The solution consumption is approximately 5 l/sq.m. m of planting area.
It should be noted that onions on fertile and well-filled soils with mineral fertilizers do not need to be fed with fertilizers, limiting feeding with microelements and ash extract.

Protecting onions from diseases and pests
To protect onions from diseases and pests, plants are treated with biofungicides (against diseases) and bioinsecticides (against pests) for preventive purposes. The most common biofungicides are planriz, gaupsin, alirin-B, trichodermin, gliocladin. For treatment against pests, actofite, aversectin-C, bitoxybacillin, verticillin, and bicol are used. It is better to prepare solutions for treatment in tank mixtures. Always select biological products, dosage and mix them according to the instructions. Onion treatments are carried out at least 3-5 times during the growing season in the morning. The last treatment can be carried out 2-3 days before harvesting. Biological products are absolutely safe for people and animals.
Treatments begin at the first visible changes in the color of the feather or the condition of the plants.
The beginning of harvesting is determined by the state of the above-ground mass of onions. Depending on the variety:
- plant leaves turn yellow,
- lodging,
- lose turgor, etc.
When harvesting, onions are pulled out of the soil and left for 1-2 weeks under a canopy for final drying. The dried onions are sorted out and dense bulbs with a dry root collar, covered with dry upper scales, are put aside for winter storage. Before placing them in containers for storage, dried stems are cut 3-5 cm into a stump or braided and hung in a dry, warm place.

Thus, growing onions with large bulbs requires careful implementation of agrotechnical techniques, the main of which are:
- selection of a zoned variety;
- quality of seed;
- timeliness of sowing;
- compliance with the rules of care, which include timely watering and fertilizing, keeping the soil moist, weed-free, with optimal plant density.
High-quality implementation of agricultural technology requirements creates all the prerequisites for obtaining a high yield of large bulbs.
As a crop, onions were known, used as food and as medicine, even by the Sumerians. In Rus', onion culture appeared around the 12th century. Today it is cultivated all over the globe. This plant gained such popularity for its medicinal and nutritional qualities. Onions and green onions contain phytoncides - compounds with strong bactericidal properties, vitamins A, B, B1, B2, C, PP, mineral salts and other substances necessary for humans. It is eaten fresh in salads, as well as in the preparation of hot dishes and in the canning industry. In this article we will talk about agricultural technology for growing onion sets.
Bulb onions. © Dixondale Farms
Biological features of onions
Onion is a one-, two-, and three-year-old plant. In the first year, from the seeds (nigella) of onions, onion sets or arbage are obtained - small onions 1-2 cm in diameter with a weight of 2-5 grams. In the 2nd year, a large onion (uterus) is obtained from the set. Mother bulbs are a commercial onion. In the third year, when the queen is planted, onion seeds are obtained, which are called nigella for their color.
In the southern regions, onion seeds can also be obtained by growing them for two years: in the first year, a large uterus bulb is obtained, and in the second year, a testicle is formed on a high straight peduncle in the form of capitate round inflorescences.
Variety of onions
Onions, in relation to the length of the photoperiod, are divided into 2 large groups:
- a group of varieties of the northern direction. They develop normally and form vegetative (bulbs) and generative (nigella seeds) crops only when the daylight hours are 15-18 hours per day. Northern varieties, in short daylight conditions, only have time to grow green feathers, and do not form bulbs at all.
- Varieties from the southern regions form a normal harvest with short daylight hours - 12 hours a day. When the photoperiod lengthens in southern varieties, the bulbs do not ripen and are poorly stored.
- Today, breeders have developed varieties that do not react so painfully to the length of daylight hours and grow and develop normally in the north and south, under other optimal conditions.
Based on taste, onions are divided into 3 groups:
- spicy,
- semi-sharp,
- sweet or salad.
The specific pungency or bitterness of onions is given by essential oils, or rather, the ratio between sugars and essential oils. The less sugar, the less essential oils, which means the less pungency of the onion bulb and leaves (feather). Today, breeders offer varieties without bitterness, the so-called sweet salad varieties.
 Onions from sets to large onions. © Susy Morris
 General approaches to agricultural technology for growing onions
Predecessors and compatibility
Onions have a fibrous root system, which cannot produce high yields without additional nutrition. Therefore, onions are placed after crops that received manure during autumn tillage (early cabbage, tomatoes, cucumbers, early and mid-sized potatoes, zucchini, melons, legumes).
Onions have good compatibility with all types of cabbages, carrots, beets, radishes, and greens, which makes it possible to combine these crops in compacted crops.
Soil requirements
Onions develop normally on neutral soils at pH = 6.4-6.7. If the soils are acidified by long-term application of mineral fertilizers, then 2-3 years before sowing onions, the soil under the previous crops is deoxidized by adding slaked lime and dolomite flour 200 g/m². Onions cannot tolerate liming the soil before sowing and planting. You can use wood ash 300-400 g per 1 m² of area.
Onions do not like fresh organic matter, but on depleted soils in the fall or spring, you can add mature humus to it at 1.5-2.0 kg/m² of area. In the fall, part of the phosphate and potassium fertilizers are also added to the digging.
The second half with the addition of nitrogen fertilizers is used in the spring before sowing and planting the crop. On rich chernozems, they limit themselves to adding decomposed organic matter for digging. On peaty soils, nitrogen fertilizers are excluded, and the dose of phosphorus is increased by 30-40%.
Environment Requirement
Onions are cold-resistant crops. Therefore, sowing and planting are carried out in early spring, when the soil temperature in a 10 cm layer rises to +10..+12°C, and the air does not drop below +3..+5°C. Onion seedlings are not afraid of short-term spring frosts. Cooling down to -3°C does not harm seedlings, but adult plants, when low temperatures set in (-3..-5°C), stop growth and development, and seed ripening.
Onions need a sufficient amount of moisture, especially during the formation of seeds and mother bulbs. With a lack of moisture, seeds turn out to be puny with low germination, and the bulbs are small and lack juiciness.
Onions are grown in several ways: seeds, sets (arbage), selection, seedlings.

Specifics of growing onion from sets
The most common method of obtaining large marketable bulbs in all regions is growing from sets.
Preparing the soil for sowing
In garden crop rotation, onions are returned to their original place after 3-5 years. In the autumn, after harvesting the predecessor, the soil is freed from weeds and watered, provoking the emergence of weeds. Then they dig deep (25-30 cm).
Before digging on depleted soils, add mature humus or compost (0.5 buckets) per 1 m², and complete mineral fertilizer - 25-30 g of urea and granulated superphosphate, 15-25 g of chlorine-free potash fertilizers. In the spring, before planting the sets, 10-15 g of nitroammophoska are added for loosening.
Onions love to show themselves in all their glory, so on loamy soils they are planted on ridges on which the onion from the turnip growth phase is opened by 1/3 (the shoulders are released). This technique helps the large onion to form and ripen in time. The top, hidden under heavy soil, accumulates water (especially in rainy weather) and is affected by a fungal infection.
On light, permeable soils, using the same technique, plant the arbage on a flat surface. The mulched surface prevents rapid evaporation of moisture, and the open hangers receive the required share of sunlight.
Preparing the sets
In the fall, after harvesting and drying, the harvested crop is divided into 2 fractions. Planting material with a diameter of 1.5-3.0 cm (sets) and smaller than 1 cm (wisps) is selected. Oatmeal is usually sown in open ground before winter in warm regions, and in a greenhouse in cold northern regions.
In the spring, 2 weeks before planting, the seedlings are sorted into fractions and bulbs of the same size are planted separately, which makes it possible to obtain bulbs that are uniform in size. The selected material is freed from shrunken and diseased bulbs, dry scales and other small debris.
Arbaja with a diameter of more than 3 cm (sampling) is planted separately. Large bulbs bolt early and do not form a normal bulb. Therefore, they are usually used to obtain green feathers.
The material selected for planting is heated for 6-7 hours at a temperature of +40..+45°C. Before planting, planting material is disinfected in a 1% solution of potassium permanganate (0.5 hours). Recently, solutions of biofungicides (planriz, gamair, phytosporin) have been used more often. The sets are soaked for 1-2 hours before planting permanently.

Planting sets
Arbage is planted for one's own use, usually in a single-line manner, leaving row spacings of 40 cm and rows of 4-6 cm. You can use multi-line tape sowing with row spacings of 20 cm for planting. In this case, the middle row of 3 rows of tape is used on a feather. The freed up area will allow the formation of a larger bulb.
The planting depth is regulated by the size of the arbage. It is planted so that the “tail” is not covered with soil. In dry weather, pre-emergence watering is carried out or the furrows are watered with a stream from a watering can before planting.
Shoots appear on days 9-12. It is very important not to neglect the crops and get rid of weeds and soil crust in a timely manner. Loosening is superficial so as not to damage the delicate root system of the seedlings, located in the upper 10-30 cm layer. You can't hill onions!
Feeding
The first feeding is carried out during the leaf growth phase, after 2-3 weeks, especially if the onion develops a thin light feather. Usually, urea is used at the rate of 20-25 g per 10 liters of water and the solution is applied under the root for 10-12 linear meters. During this period, good results are ensured by fertilizing with nitrophoska, nitroammophoska, 25-30 g/m² of area for irrigation or a solution, like urea. When feeding with solutions, be sure to wash the plants with clean water from a watering can with a fine-mesh nozzle.
The second feeding is carried out with phosphorus-potassium fertilizers in the second decade of June or 3 weeks after the first. Prepare a solution of 20-30 g of superphosphate and 10-13 g of potassium salt. You can use nitroammophoska - 40 g/10 l of water (2 tablespoons without top).
On depleted soils, a third fertilizing can be carried out (look at the condition of the plants), but nitrogen fertilizers must be removed from the composition. You can use a phosphorus-potassium composition in the dose used for the second feeding.
It should be noted that the soil, well-dressed before planting, eliminates fertilizing. Removing weeds, loosening and watering are sufficient to obtain an average harvest of environmentally friendly vegetable products.
 Onion sets. © Karen Jackson
Watering
For normal growth and development, onions use little water, but require constantly moist soil in the first month after germination and during the period of bulb growth. At first, watering is carried out once every 2 weeks, and if the weather is dry and hot - once a week, followed by mandatory loosening of the soil (destruction of pests and their larvae), mulching.
The soil is soaked in the first month to a 10 cm layer, increasing it to 20-25 cm towards the growth phase of the bulbs. In the last month, watering is stopped and they switch to “dry watering”, that is, loosening the soil, destroying the drying crust, freeing the upper part of the bulbs from land.
Protection from diseases and pests
Of the diseases, onions are most often damaged by fungal diseases (downy mildew, root rot) and numerous pests (onion flies, moths, thrips, nematodes, hoverflies, secretive proboscis) associated with violation of recommended agricultural cultivation techniques.
At the first visible changes in the color of the leaves, the appearance of light spots, dashes, wilting of the feather, its curling, it is necessary to spray the leaves with a tank mixture of biofungicides and bioinsecticides, according to the recommendations. They are harmless to humans and animals. Chemical protection on onions is not recommended, and when cultivating green feathers, it is prohibited.
Harvest
The onset of the ripening and harvesting phase is determined by the condition of the leaves. Their lodging and yellowing indicate the maturation of the bulbs. In dry and sunny weather, the bulbs are pulled out of the soil and left in place or transferred under a canopy and dried for 7-10 days. They sort and trim, leaving a stump of 5-6 cm. If the soil is dense, then the roots are trimmed, being careful not to damage the bulb.
Onion varieties for growing turnips in summer cottages
For northern regions
- Peninsular - Azelros, Crimson Ball;
- Spicy - Bessonovsky local, Rostov local;
- Salad – Lisbon white, Ailsa great, Alice, Albion F1
For southern regions
- Peninsular – Iris;
- Spicy – Sunny;
- Salads – Dnestrovsky, Kaba, Yellow Kaba.
The varietal diversity of onions is much richer than the examples given. But when choosing seeds or sets for growing in the country, be sure to use local, zoned varieties. Varietal confusion is unacceptable. You will not get the expected harvest, and the grown bulbs will be of poor quality and lack shelf life.